Tutorial: Easiest way to Install Arch Linux on Desktop
Arch Linux is often portrayed as being hard to install , highly technical , do it yourself and not an user friendly linux distro.
But Arch Linux has its own advantages like high performance , less bloat and freedom to modify all parts of operating system.


The official Arch Linux iso has a component called archinstall which can be used to easily install arch linux, so that even newbies can try arch linux without much technical knowledge. So here are the basic steps after burning the iso image on USB stick and booting into the live iso.
step 1: Boot into live os and choose the first option to install and connect internet via USB tethering by connecting PC to phone.

step 2: Wait for some time and get access to shell.

step 3: Type archinstall in the shell to begin installer.

step 4: When asked for keyboard layout press enter to use default US keyboard layout.

step 5: When asked about region to download packages choose the region closest to you and type its respective number which is displayed on screen for eg: 26 for India.

step 6: Enter number associated with option which contains sda when asked which harddrives to configure it is mostly 1.

step 7: Press enter after getting >> mark shown before option containing sda.

step 8: type 0 to use default partition layout.

step 9: choose ext4 as filesystem ( brtfs may be better but it has issues with full disk encryption using luks2 at time of writing in archinstall refer github issue: https://github.com/archlinux/archinstall/issues/1031 )

step 10: Enter long and strong password for full disk encryption or leave blank for no encryption.

step 11: Enter y to use zram as swap , it increases performances by compressing sections of RAM and using it as swap when possible instead of slower disk writes and read operations , this also improves life of harddisks.

step 12: Leave Blank for root password simply press enter , when prompted for sudo user enter any username and provide strong password when prompted.

step 13: select 0 to use Desktop pre-programmed profile.

step 14: select appropriate Desktop Environment. Gnome , KDE , Cinnamon , XFCE , lxqt , budgie , mate are user friendly.

step 15: select all open source graphic drivers when asked.

step 16: use pipewire with kde , gnome Desktop Environments or with sway else use pulseaudio.

step 17: Use linux zen which is optimised for Desktop use or use default kernel.

step 18: After getting >> mark on linux zen press enter.

step 19: when prompted for additional packages to install type chromium and any other package names which you may want.

step 20: Choose Network Manager to configure Networking.

step 21: Enter a valid timezone like Asia/Kolkata for India.

step 22: enter y to use ntp to get accurate time.

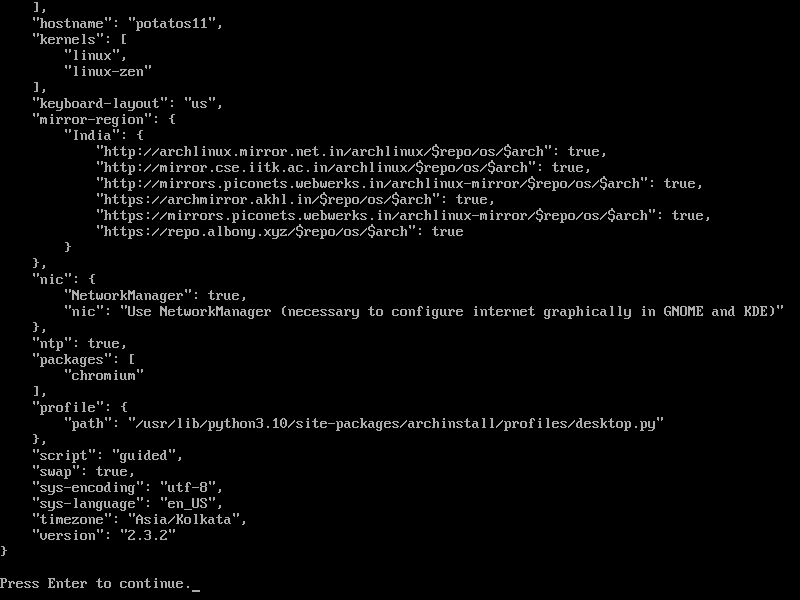
step 23: Review settings and press enter and installer will start installing required stuff automatically.


step 24:when asked to chroot into newly created installation to perform post installation steps enter n

step 25: You have successfully installed Arch Linux if you get this message. shutdown PC , remove the pendrive and power on PC.

step 26: Enjoy Arch Linux.


Comments
Post a Comment